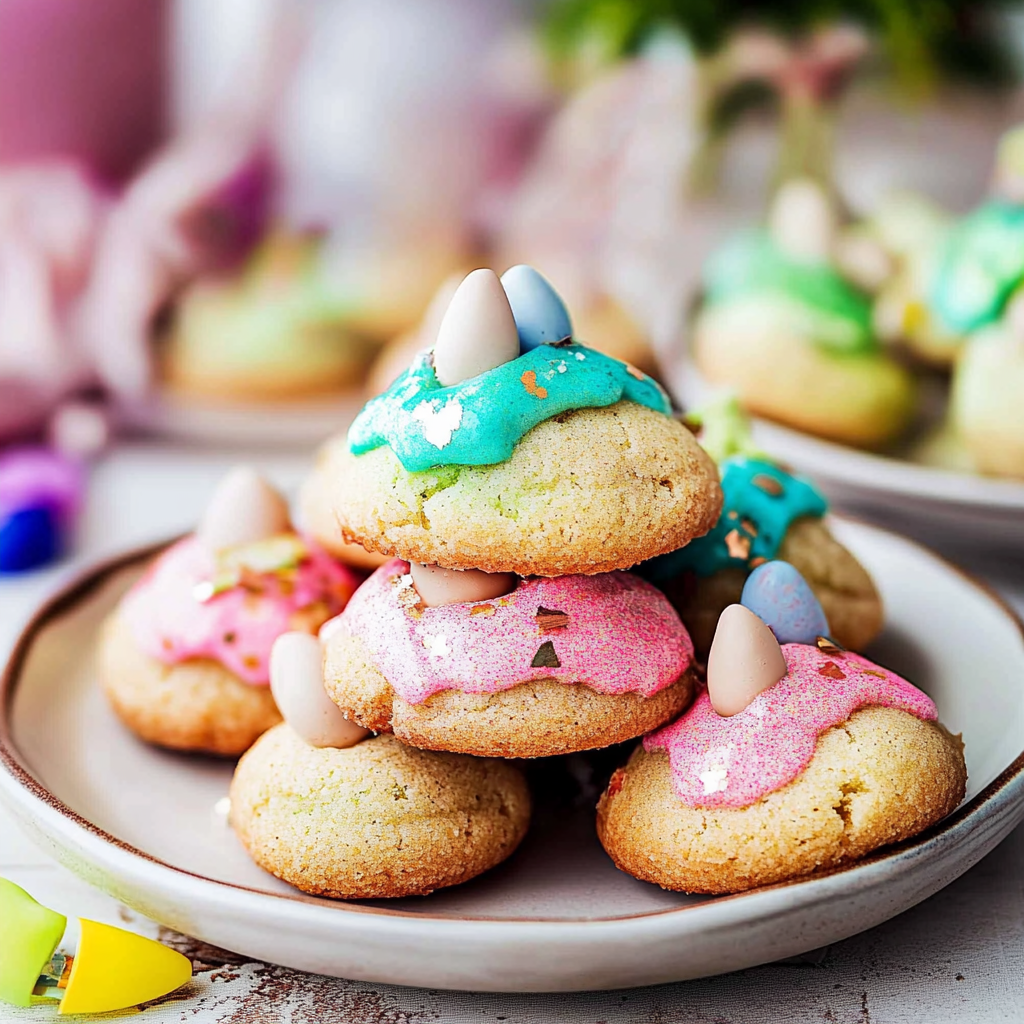
The scent of freshly baked cookies wafts through the air, a warm embrace inviting you into the world of Easter Blossom Cookies. These delightful treats are not just cookies; they’re edible springtime magic, bursting with flavor and adorned with vibrant pastel hues that make your heart skip a beat.

Picture yourself biting into a soft, buttery cookie topped with a melting chocolate kiss, the sweet aroma enveloping you like a cozy blanket on a chilly day. Whether it’s Easter brunch or a casual get-together, these cookies are your new go-to treat that guarantees smiles and satisfied taste buds.
Why You'll Love This Recipe
- These Easter Blossom Cookies are simple to make, perfect for sharing at gatherings
- Their melt-in-your-mouth texture pairs beautifully with rich chocolate
- The vibrant colors will brighten any dessert table
- Easily customizable with different chocolates or toppings to suit your taste!
Sharing these cookies at my last family gathering received rave reviews, especially from my niece who declared them “the best cookies ever!” It was heartwarming to see everyone enjoying them together.
Essential Ingredients
Here’s what you’ll need to make this delicious dish:
All-purpose Flour: Use high-quality flour for the best texture; it’s the foundation of every great cookie.
Sugar: Granulated sugar gives sweetness and contributes to that delightful crunch around the edges.
Baking Powder: This leavening agent ensures your cookies rise beautifully; don’t skip it!
Salt: A pinch enhances flavors, balancing sweetness in these treats perfectly.
Unsalted Butter: Softened butter adds richness; let it sit out before baking for easy mixing.
Eggs: One large egg binds everything together and adds moisture for chewy goodness.
Vanilla Extract: Pure vanilla extract is key for depth of flavor; it makes everything taste better!
Chocolate Kisses: Choose classic milk chocolate for traditional sweetness or try dark chocolate for a twist.
Colored Sugar Sprinkles (optional): Adds festive flair; sprinkle them on before baking for an extra pop of color!
The full ingredients list, including measurements, is provided in the recipe card directly below.
How to Make Easter Blossom Cookies
Preheat the Oven and Prep Your Baking Sheet: Preheat your oven to 350°F (175°C). Line two baking sheets with parchment paper to prevent sticking and ensure even baking.
Mix Dry Ingredients Together: In a medium bowl, whisk together flour, baking powder, and salt until well combined. This step ensures your cookies have an even texture throughout.
Cream Butter and Sugar: In a large bowl, cream softened butter and granulated sugar until light and fluffy. This process takes about 2-3 minutes; you’ll know it’s ready when it appears pale yellow and airy.
Add Eggs and Vanilla Extract: Mix in one egg and vanilla extract until fully incorporated. This mixture should be smooth and creamy; it adds richness to each bite.
Combine Wet and Dry Mixtures: Gradually add the dry ingredients to the wet mixture, stirring until just combined. Be careful not to overmix; we want soft cookies that melt in your mouth!
Scoop Dough onto Baking Sheets: Use a cookie scoop or tablespoon to drop dough onto prepared sheets about 2 inches apart. They’ll spread while baking, so give them some room!
Bake and Top with Chocolate Kisses: Bake in preheated oven for 10-12 minutes until edges are golden but centers are still soft. Remove from oven, immediately press a chocolate kiss into each cookie center; let cool slightly before transferring to wire racks.
Now you’ve made Easter Blossom Cookies that are sure to impress! Enjoy them fresh out of the oven or store them in an airtight container for later indulgence. Happy baking!
You Must Know
- Easter Blossom Cookies are a delightful treat that bring springtime joy
- Their vibrant colors and soft texture make them perfect for family gatherings and festive celebrations
- The sweet aroma of vanilla wafting through your home will have everyone flocking to the kitchen!
Perfecting the Cooking Process
Start by preheating your oven while you mix the dough. Chill the dough for at least 30 minutes before baking to help maintain shape and enhance flavor.
Add Your Touch
Feel free to swap out the traditional sprinkles for edible flowers to create a more whimsical look. You can also experiment with different extracts, like almond or lemon, for a unique twist.
Storing & Reheating
Store your cookies in an airtight container at room temperature for up to a week. For longer freshness, freeze them in single layers separated by parchment paper.
Chef's Helpful Tips
- For perfect Easter Blossom Cookies, remember to let the dough rest
- This simple step helps improve flavor and texture
- Always use fresh ingredients for the best results; stale baking powder can ruin your batch
- Enjoy experimenting with fun decorations that reflect your personality!
Sharing my first attempt at these cookies brings back fond memories—my dog “helped” by sneaking one off the counter, leaving me with only crumbs and laughter!
FAQ
What is the secret ingredient in Easter Blossom Cookies?
The secret ingredient is chilling the dough, which keeps cookies from spreading too much.
Can I use gluten-free flour for these cookies?
Yes, using a gluten-free blend works well without sacrificing taste or texture.
How long do Easter Blossom Cookies last?
They stay fresh for about one week when stored properly in an airtight container.

Easter Blossom Cookies
- Total Time: 27 minutes
- Yield: Approximately 24 cookies 1x
Description
Easter Blossom Cookies are a delightful spring treat that combines a soft, buttery cookie base with rich chocolate kisses, creating a perfect bite of sweetness. Adorned with colorful sprinkles, these cookies are not only visually appealing but also incredibly easy to make. Ideal for Easter gatherings or any festive occasion, they are guaranteed to bring smiles and warmth to your dessert table.
Ingredients
- 2 cups all-purpose flour
- 1 cup granulated sugar
- 2 tsp baking powder
- 1/4 tsp salt
- 1/2 cup unsalted butter, softened
- 1 large egg
- 1 tsp vanilla extract
- 24 chocolate kisses (milk or dark chocolate)
- Colored sugar sprinkles (optional)
Instructions
- Preheat the oven to 350°F (175°C) and line two baking sheets with parchment paper.
- In a medium bowl, whisk together flour, baking powder, and salt.
- In a large bowl, cream softened butter and sugar until light and fluffy (about 2-3 minutes).
- Mix in the egg and vanilla extract until smooth.
- Gradually add the dry ingredients to the wet mixture, stirring until just combined.
- Scoop dough onto the prepared sheets, spacing them about 2 inches apart.
- Bake for 10-12 minutes until edges are golden but centers are soft; immediately press a chocolate kiss into each cookie center before cooling on wire racks.
- Prep Time: 15 minutes
- Cook Time: 12 minutes
- Category: Dessert
- Method: Baking
- Cuisine: American
Nutrition
- Serving Size: 1 cookie (about 30g)
- Calories: 130
- Sugar: 9g
- Sodium: 85mg
- Fat: 6g
- Saturated Fat: 3g
- Unsaturated Fat: 2g
- Trans Fat: 0g
- Carbohydrates: 19g
- Fiber: <1g
- Protein: 1g
- Cholesterol: 15mg